6 calculator functions to help your students get the most from the fx-CG50 – part II

It’s back by popular demand: here are six more functions to help your students get the most from the fx-CG50! We spoke with mathematician Simon May to uncover even more tips and recommendations to help your students use the Casio fx-CG50 calculator. He covers helpful points that you can use to make your classes more efficient, engaging and, yes, more fun. Here we go!
1: Save Variables
Within fx-CG50, there’s the ability to save variable values. For example, if you enter or calculate a certain value, you can save it to a variable, which can be a letter between A and Z. You can store a particular value by pressing “🠪, and that’s it. This function allows you to do simple things such as adding a new value, or doing a multiplication. Or, you could even add two different variables together. The possibilities are endless.
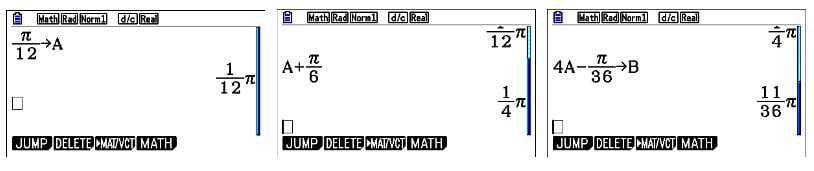
You can also take it a step further, by doing a calculation and then store the answer as a variable as well. This will save your students time as they no longer have to write down the answer and then re-enter it for use in later calculations. Be aware that at first, the store function may be hard to find for students if they’re used to other calculators (in that case they’re probably looking for a button). Therefore, always tell them to look for the store arrow.
See Quick Skill: Memory – Using Run-Matrix – Casio Calculators
2: Answer history
Next up is the ability to use the answer that has just been calculated, by using the ANS button. Your students can go back up all the way through their workings and, for example, change a value which will then affect all of the done calculations. Again, this saves a lot of time as your students no longer have to redo all of the calculations.
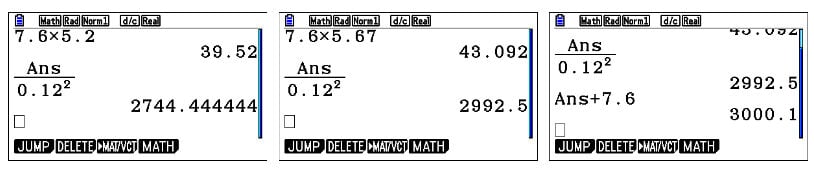
The difference between the answer history function and the store function (tip 1) is that the answer function only relates to the very last thing that your students have calculated. In the case of the store function, you can scroll all the way back up and store values anywhere in the history.
Ps. In addition to tip 1 and 2, you also have the ability to edit previous calculation lines. This comes in very handy as there are often different ways to approach a calculation. Your students can scroll through their answers and try out different calculations and compare the outcomes.
3: Label points
Let’s move on and draw some graphs. In the previous blog, we discussed how to set a square scale. Now, a next step is to find out what a particular value is and have it shown on the graphed function, which makes things very visual for students. Once some analysis of a function has been done, the coordinate values can be pinned to a fixed point. As the ability to label points is so visual, it becomes easier for students to detect patterns and relationships between different values.
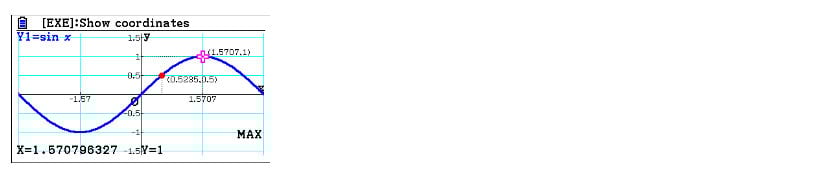
Labeling points also helps students to run several analyses within the same graph, such as finding the maximum.
This is where fx-CG50 truly changes the way you teach. Without it, you would’ve probably written the values on the board instead of having students figuring things out themselves. By drawing their own graphs, students get more freedom to experiment with different values and analyses, which in turn builds their confidence for exams.
Ps. Don’t forget you can actually clear the points by clearing the screen, and go back to your original graph.
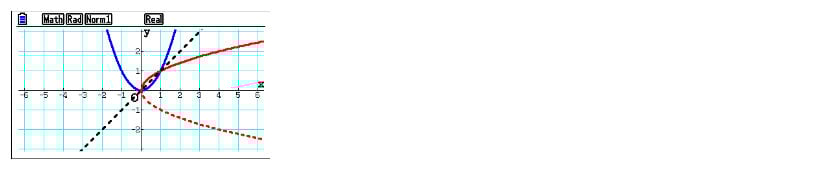
4: Format function
Quite often, you may be interested in changing the way that a function is shown, therefore it is worth knowing how to format a graphed function, such that you can change the style and/or the colour. For example, you can change the style into a dotted line. Maybe you want a dotted line just to highlight a certain feature. Or maybe you want to draw two functions that are the same colour if you’re interested in trying to demonstrate a certain point. The choice is yours!
5: Option
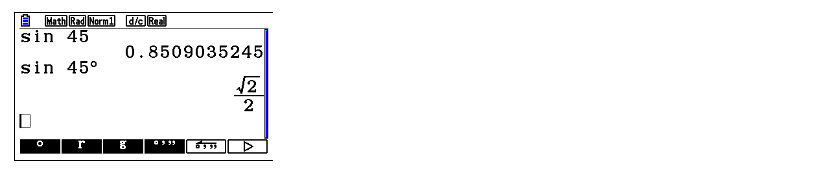
Students may not be aware that the calculator is set in radians by default. However, as there’s also the ability to switch the setting to degrees, students should be aware how to do this. Another thing that’s worth mentioning is Option. This gives access to lots of really useful functions, but with regard to angles there is a feature that can help students with their calculations.
So, if a question goes as follows: “What is Sin of 45 degrees?”, this can catch students out if they use radians, as it’s a huge angle. Instead, they should use the option button and ANGLE and then choose the degree symbol so that the calculator knows that it’s 45 degrees.
6: Using minutes and seconds
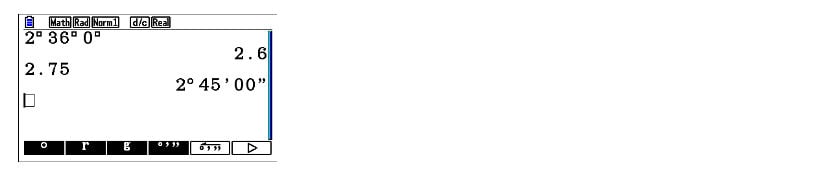
As an addition to tip number 5, there’s also the ability to switch to minutes and seconds, which may be useful when students are dealing with mechanics. Time is a great example here. Let’s say they need to convert two hours and thirty-six minutes to decimals.
Now, this may take a lot of time to calculate if your students did this manually. On the fx-CG50 calculator, it’s easy to convert time into decimal values (in this case two hours and thirty six minutes would be 2.6 hours).
This function helps your students to swap between the aforementioned degrees, minutes and seconds and decimals, which will make calculating values easier.
Book a training
So there you have it: six more things that are worth having to chat about with students. Did you also know that you can help your students get the most out of the fx-CG50 graphic calculator by signing up for our free skills training sessions? The training is run by experts who are very familiar with the calculator.
Recommended

Probability: key challenges and how calculators can help
Read more
Ratio: why is it such a challenge and how can a calculator help?
Read more
Building calculator confidence for GCSE maths
Read more