6 Calculator Settings to Help Your Students Get the Most from the fx-CG50

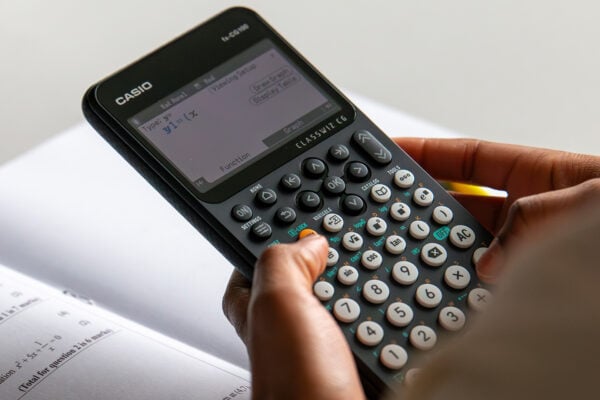
Getting students familiar with the key features and settings on the fx-CG50 is important to help them build confidence with the handset. Although the fx-CG50 is user-friendly and easy to use, sometimes students can be thrown off course when their calculator is in the wrong setting for what they’re working on – especially when they don’t see what they’re expecting on the screen.
Familiarising them with commonly used settings means they can quickly change these, enabling them to focus on the topic and not get sidetracked by their calculator settings.
Running a session early in the school year means that everyone in the class is on the same page and knows what they need to do to switch between different settings on their handset.
Investing time to go through this together improves how students feel about using their calculators. More importantly, it means they’re less likely to be thrown by something unexpected during their exams.
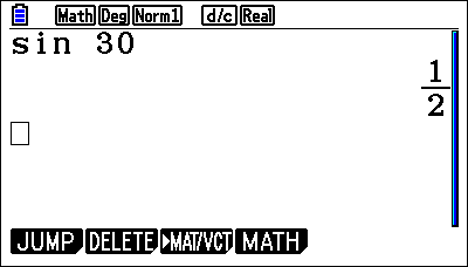
1: Ensure students understand when their calculator is showing the right value
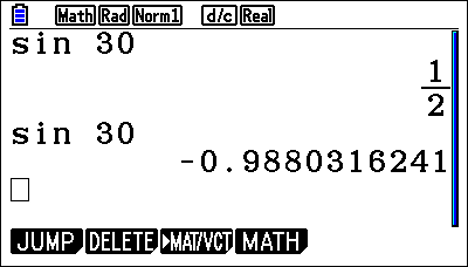
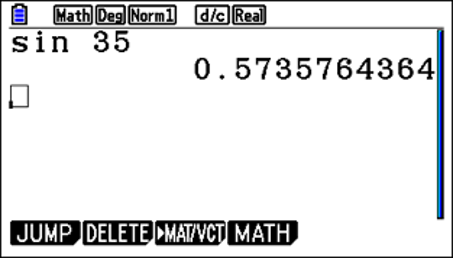
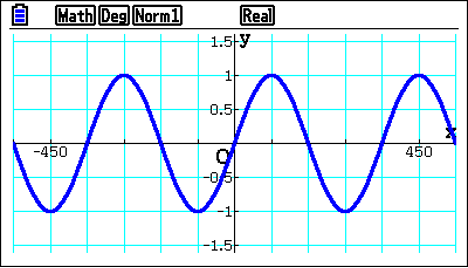
Students can double check the setting by calculating something simple like sin 30 degrees and see if it gives the correct decimal. They will get a completely different value if it’s sine of 30 radians – and they should be able to identify it as incorrect.
Many students find it helpful to graph functions, even when solving an equation because the visual representation on the screen clearly shows whether they have the right value. Without the visual representation, it can be harder for students to recognise the wrong value.
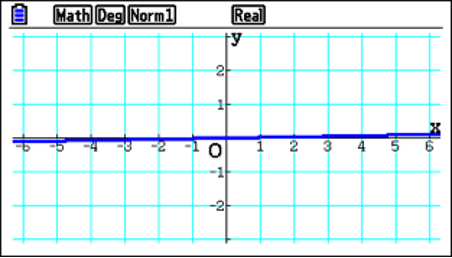
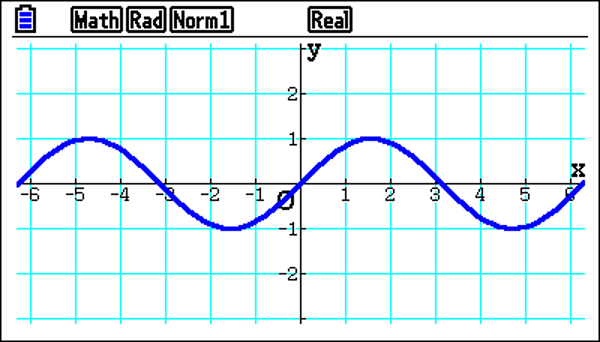
For instance, if they draw Y1=sin x, and it doesn’t look like the sine function they’re used to, this should prompt them to check their scale settings.
2: Show students how to use add and subtract for zoom functionality
Using the add or subtract buttons is a very quick and easy way to zoom in or out of a graph. Also, when students zoom in, this action may reveal the grid lines if they’re not already showing.
Students shouldn’t worry if they can’t see the gridlines; they’re always there. But, sometimes, the current scale settings may not provide enough screen space to display them.
3: Check students know how to set a square scale
A square scale can be very useful because it enables students to recognise a curve’s shape. From here, they can see that the horizontal and vertical distance is the same – which is the format students see the most. It’s also important because it helps students to sketch, which is easily accessible from the View Window.
The square scale is also helpful when working with tangents and normals because it means the normal appears perpendicular to the curve. Without the square scale, students can draw a normal that doesn’t look perpendicular to the curve anymore, which can be disorienting.
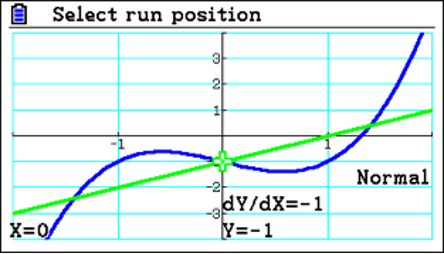

The normal might sometimes be as simple as y=x, creating a line at 45 degrees to the horizontal. However, if you draw y=x on a non-square scale, it’s not at 45 degrees. This visual might confuse students and make them think the value can’t be y=x, even though that is the case.
4: Get students familiar with the basic calculator settings
In the basic setup, it may be useful to turn on Derivative; especially when creating tables or drawing graphs where tangents and normals could potentially be considered.
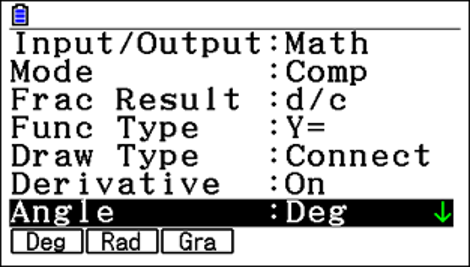
And, when measuring angles, it’s important to know that the default setting is radians. Examiners try and catch students out by asking questions in degrees so check students learn how to change the settings.
Accessing the setup menu is straightforward: in Run-Matrix, go to shift and menu, Students can scroll to Angle in the setup menu to check the setting. If they need degrees, they can change it by selecting the on-screen choice Deg.
5: Make sure students are familiar with different functions
Run-Matrix is where students do all their calculations, and graph mode is where they draw things.
When using graph mode, remind students that when analysing the functions with G-Solve, they can use y cal and x cal with the F6 further menu. It is a useful feature, especially as a common question is when y equals this, what is the x value?
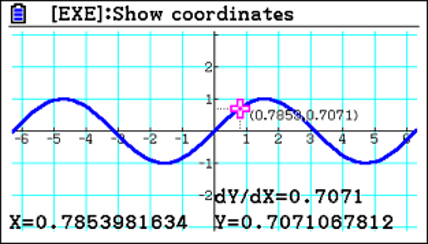
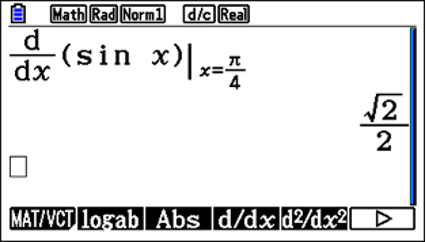
Also within Run-Matrix is the MATH tool, allowing students easy access to numerical differentiation and integration. For example, they could check the differential of a function at a point. It’s straightforward to calculate here, and students don’t need to be in graph mode. But if they have the Derivative turned on, they could also draw the function and trace a point; then, they have the Derivative shown and can explore what’s happening. However, unlike Run-Matrix, it’s not in exact terms; it will only display it as a decimal.
If students use run-matrix, values can be displayed more accurately, such as surds, fractions or in terms of __ it’s good to know both methods and get students comfortable with them.
6: Remind students about equation mode
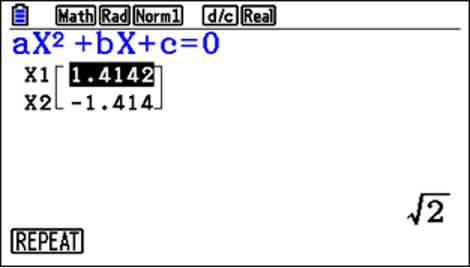
Remind students about Equation, which is a really useful mode as it’s where you can solve simultaneous equations or polynomials. Once students discover this, they usually love it as it makes calculations straightforward.
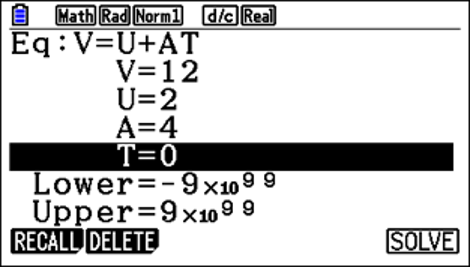
An often overlooked function is Solver, which enables students to input an equation.
For instance, entering one of the common SUVAT equations in mechanics gives the option to set the values of the parameters, making it much easier to solve.
Suppose students have three parameters with given values and are trying to solve for the fourth. In that case, they can input these into the calculator to find the hidden value – a much more straightforward approach than trying to solve it algebraically.
Allocate time to get your students comfortable and familiar with important settings on their fx-CG50 calculator. Sharing these six helpful tips and getting them to practice them in class will make them more confident with their calculator and means they’re less likely to be thrown by unfamiliar settings in their exams.
Did you also know that you can help your students get the most out of the fx-CG50 graphic calculator by signing up for our free skills training sessions? The training is run by experts who are very familiar with the calculator.